Modular Containers 2.0
The new system I now use to sort parts. Walking you through the issues with my previous system and explaining the design decisions leading to the final result. 2022-03-02
Preface
For the last two years, I had been sorting all my electronic parts and hardware components in cheap low-quality parts organizers I had found at a hardware store. They were definitely a step in the right direction, but were still flawed in one main way: all drawers were identical in size. This meant that both tiny parts (screws, LEDs, transistors...) and relatively large parts (motor drivers, microcontrollers, joysticks...) had to fit in medium-sized drawers.
The initial solution I came up with was a system of modular containers that would lock together to form a mosaic, which you can read more about here. However, this solution still had two main issues: the height of the containers was constant (too tall for small containers and too shallow for large ones), and the interlocking system I used was too effective (it was almost impossible to take one drawer without brigning half the mosaic along with it).
Because of the issues present in both systems, I had been using a hybrid of the parts organizers and of my modular containers to store my supplies, until now. About two weeks ago, I decided I would go ahead and create the ideal all-in-one sorting system: Modular Containers 2.0.
Designing the Containers
My main design goals for version 2.0 of my modular containers were as follows:
- The ability to store both tiny and relatively large parts
- The ability to bring an individual container with me to the work bench
- Have the system be entirely modular and easily expandable
- Be able to print other modules relatively quickly
With those goals in mind, I started designing the containers using Fusion 360. As I knew I wanted to be able to print the containers quickly, I decided to use a setting known Vase Mode on Cura. This meant that even though the 3D designs below are solid chunks of plastic, they would end up hollow after printing. Here are a few examples of the containers I designed:
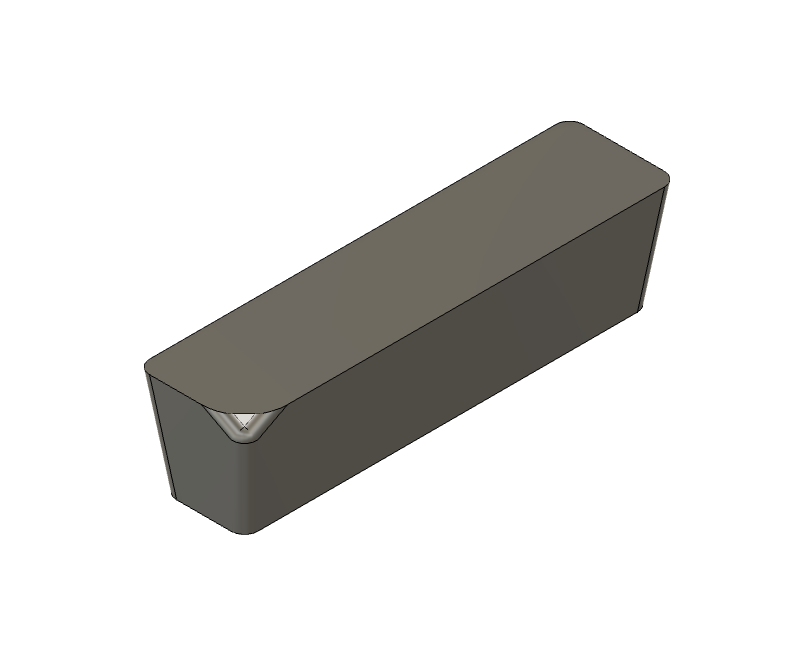 |
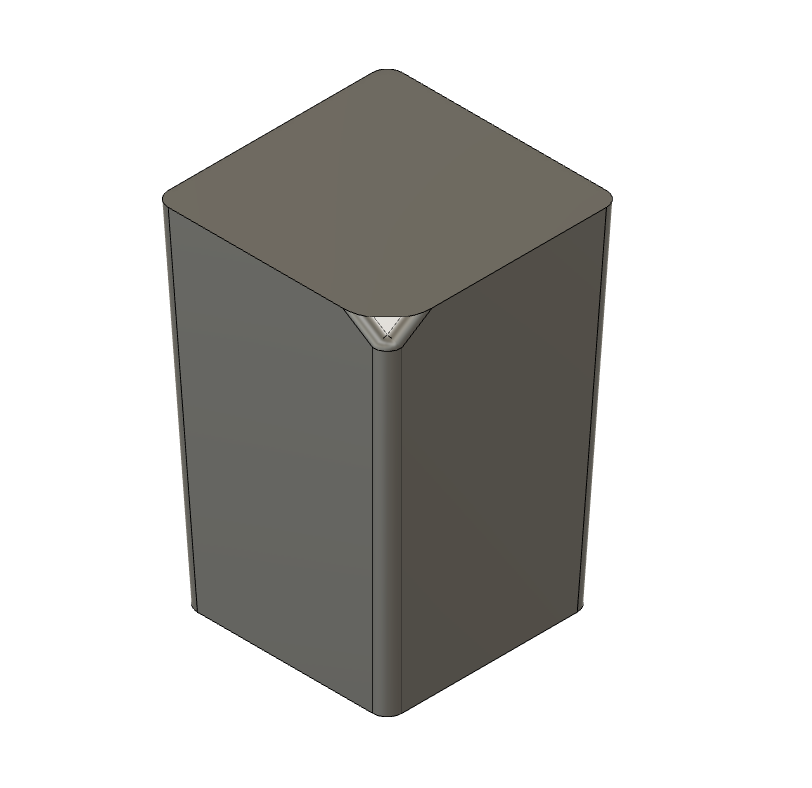 |

I designed the containers to have an angled edge in order to prevent then from catching on their neighbours when bringing individual ones with me. The bottom-left corner of each container is also chamfered to act as a handle once printed.
As I wanted this solution to be entirely modular, I had to come up with a system to determine what sizes of containers I would allow. The way I ended up solving this problem was very simple: I decided on a pseudo set of prime numbers which I then multiplied together to get a set of all possible container dimensions. In this case, I used the pseudo prime set 1, 2, 3, which produces the following set of side lengths: 1, 2, 3, 4, 6, 8, 9, 12, 16, 18, 20.... Using this approach meant that a good variety of container dimensions were available, all the while preventing any two containers from being too similar. I used parametric modelling in Fusion 360 to allow me to change the size of a container simply by modifying a single parameter, as can be seen below.

Printing the Containers
Printing the containers was very time consuming and used up about 600 g of black PLA, which is a surprising quantity. Even with my Ender 3 running at 300% print speed, it took me a few days of non-stop printing to complete the job.
If you would like to print those containers for yourself, you can download the STL files by clicking here. Don't forget to print them using Vase Mode, as otherwise, you will end up with huge chunks of solid plastic.
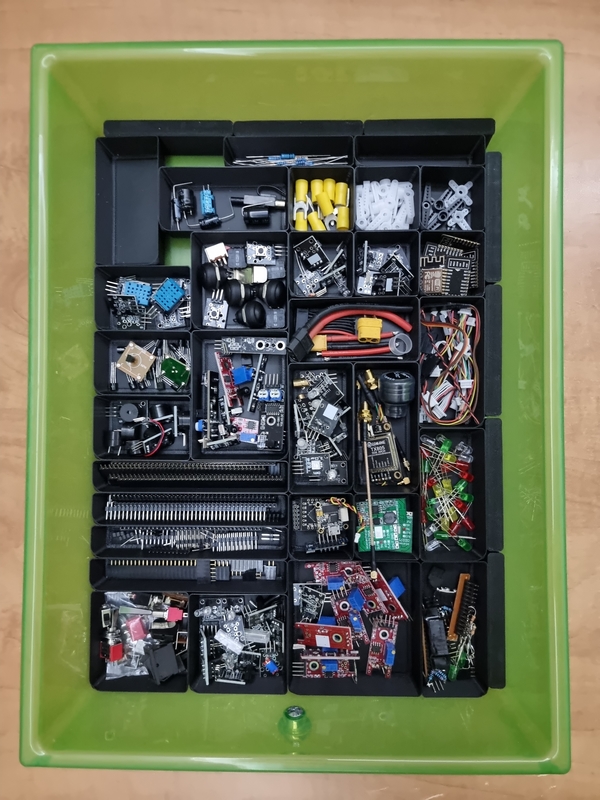
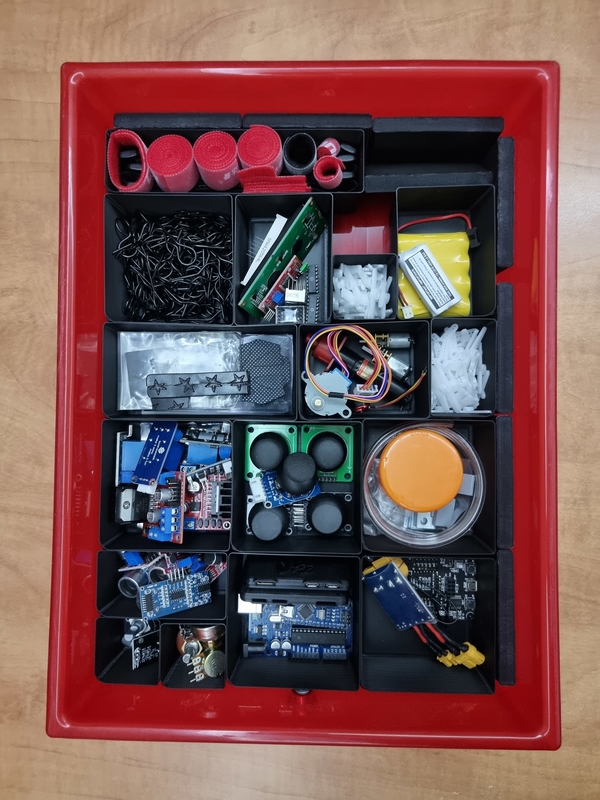
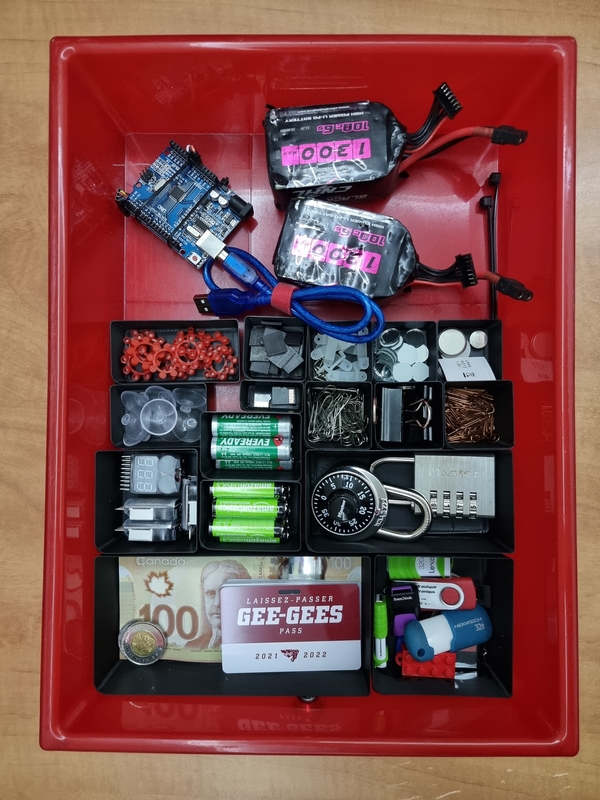
Below are pictures of my current setup with the modular containers.
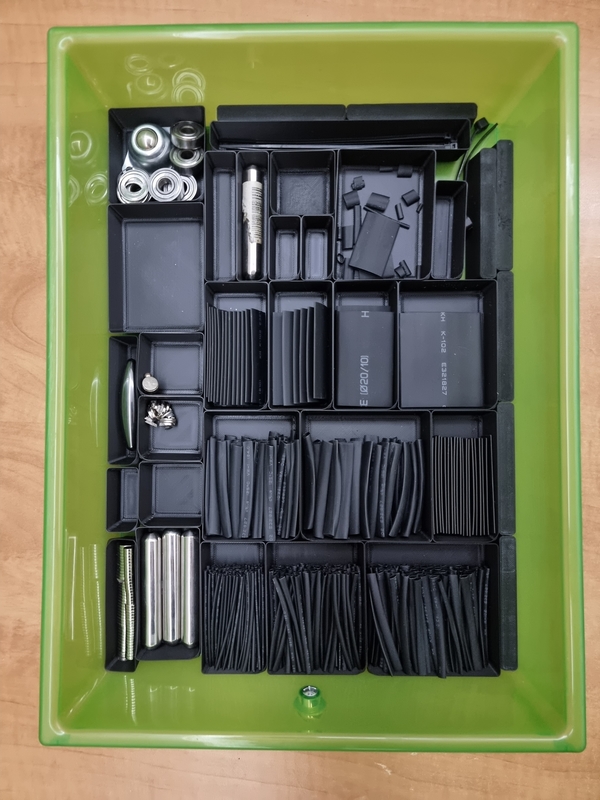 |
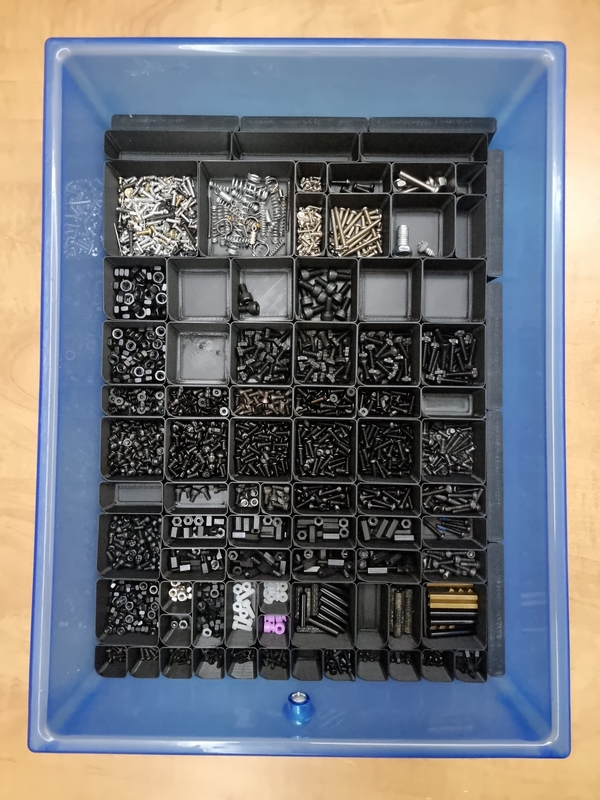 |
 |
 |
 |
|---|---|---|---|---|
Conclusion
Modular Containers 2.0 seem to be the perfect solution to store my electronic parts and hardware components in an efficient and modular manner. After having used them for a few weeks, I noticed that they provide another major advantage: it is now way easier for me to find a specific part, as I have a direct line of sight to everything stored in the containers. This could seem like a minor side effect of the design, but it turns out to be a huge time-saver in the long run. All in all, I am stoked with the final result!